This post may contain affiliate links. For more information, please see my full disclosure policy.
One of the things we introduced last year when we started doing preschool at home was a calendar board. This year, we’ll be working on pre-k, before starting kindergarten next year, and I wanted to continue using a calendar in the mornings but add a little bit more to it.
I wanted to make sure that we incorporated the calendar and days of the week along with months of the year, but I also wanted to add in weather and seasons and I wanted to find a way to make it mobile so that we could move it around the house when we wanted but also so that we could put it away for the day when we were done using it.
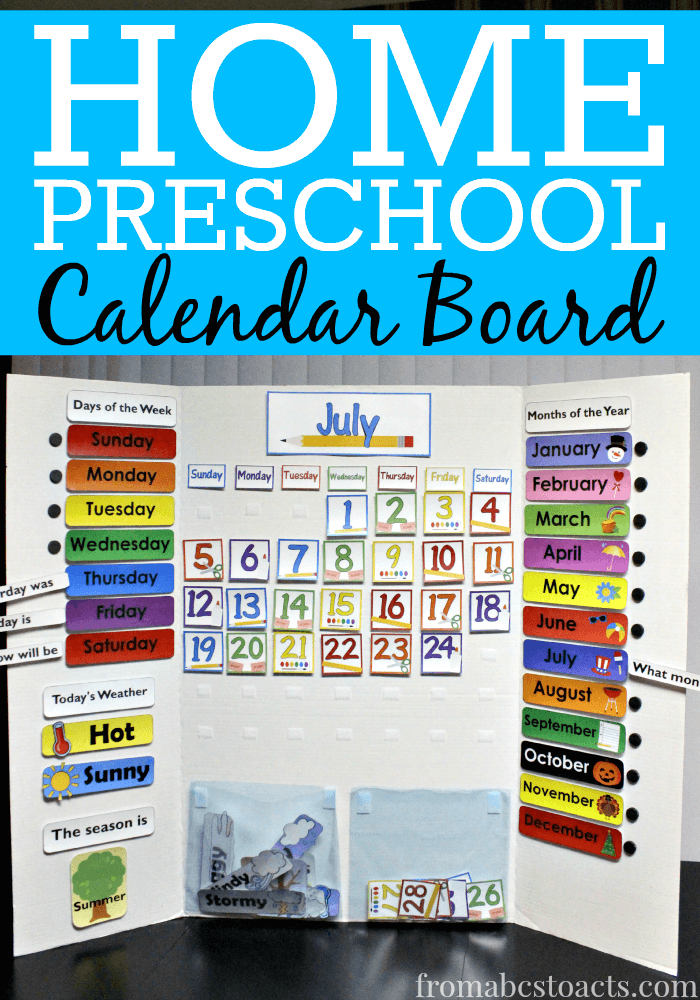
This honestly turned out so much better than I originally imagined it would and we have already had so much fun using it! It’s super simple to put together, is easy for little hands to use, and the best part, neatly folds up at the end of the day so that you can put it away :)
So, with the back to school season upon us, I thought we’d give you a little tour of our brand new calendar board and share one of the fun printable sets that we used on it.
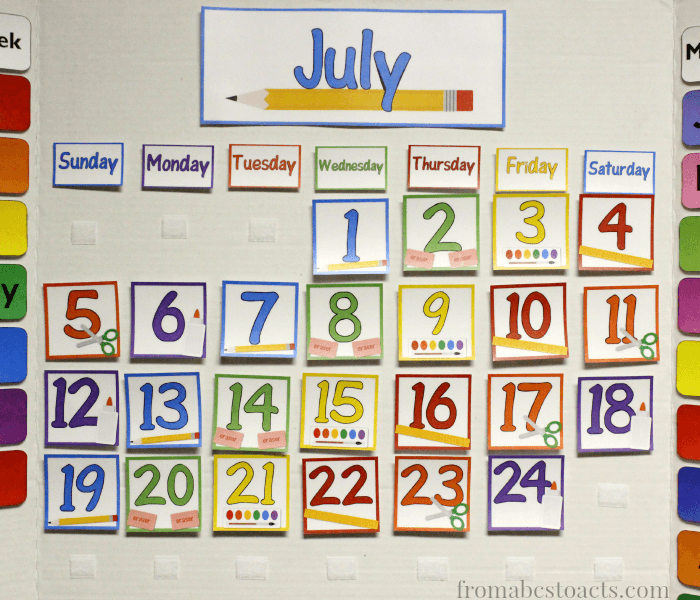
To make our calendar board, we started with a plain white tri-fold presentation board from the dollar store. They’re super cheap and are perfect for this project since they fold right up when you’re done using them for the day.
In the middle section, we added our actual calendar. I used our printable school supply calendar set as the template and spaced everything out so that it took up the entire top half. For this, Velcro strips or squares with an adhesive backing work really well. The adhesive sticks right to the board as well as the laminated calendar pieces.
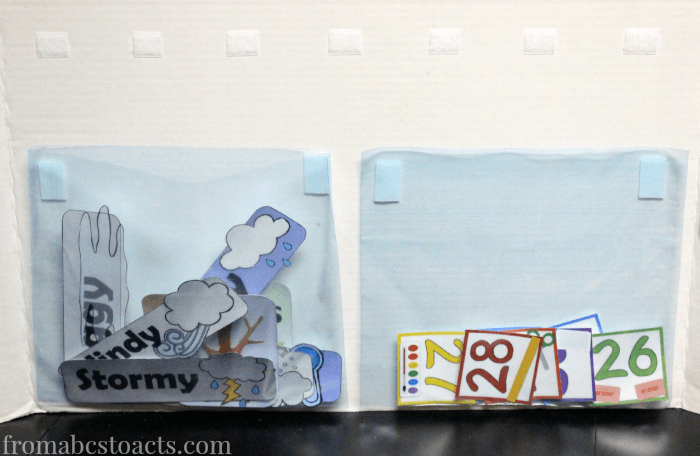
Beneath the calendar, we added a few pockets to hold all of our extra pieces that we are not currently using. For this, we actually just cut the zipper portion off of two Ziploc bags and used the Velcro to attach them. The gallon size zipper bags fit perfectly and fill up the bottom half of that section.
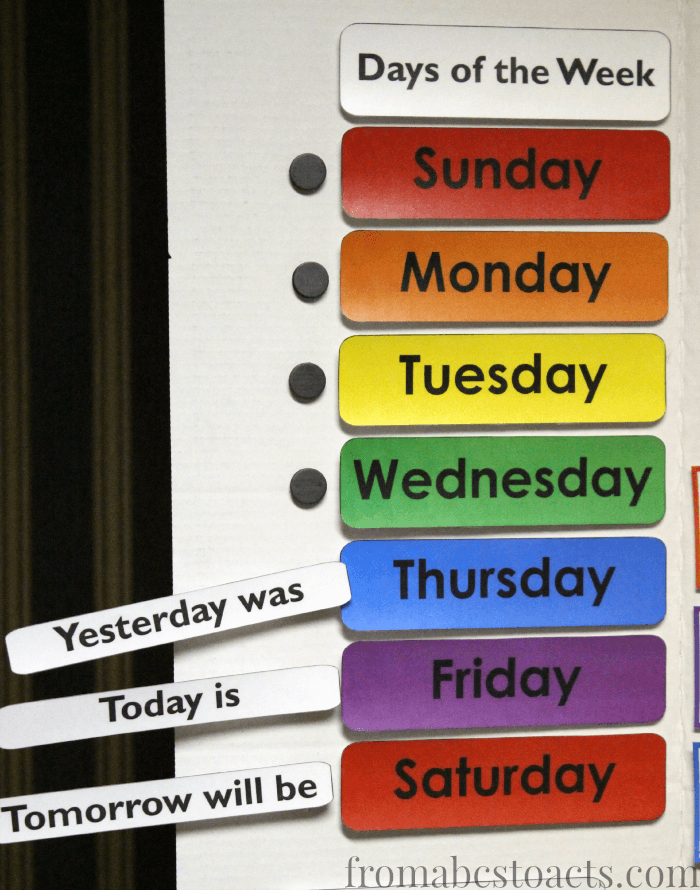
On the top of the left fold are our days of the week. For this, as well as the months of the year, we tried something a little different. Each day (and month) has a small circular magnet next to it that I simply hot glued onto the board. For the days of the week, we also have 3 extra pieces that have magnets on the back of them as well.
These pieces say:
- Yesterday was
- Today is
- Tomorrow will be
Each day we move these to the appropriate positions and the magnets make it super easy for the preschooler to move them around.
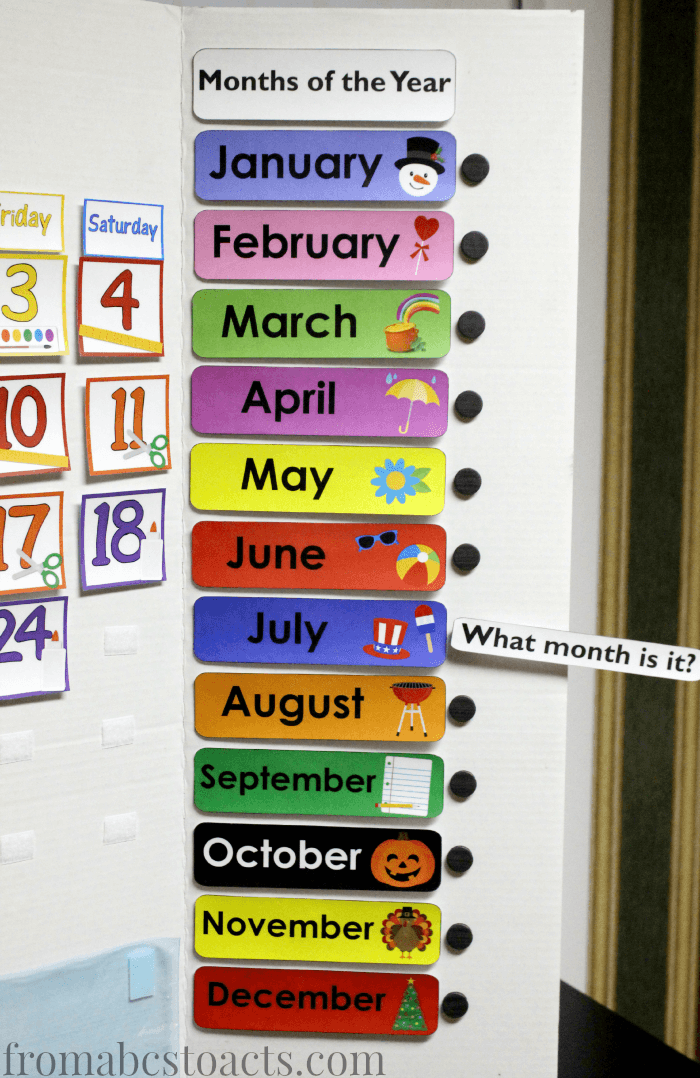
Again, those same magnets can be found on the right fold next to our months of the year. The only difference is that our extra pieces says “What month is it?”.
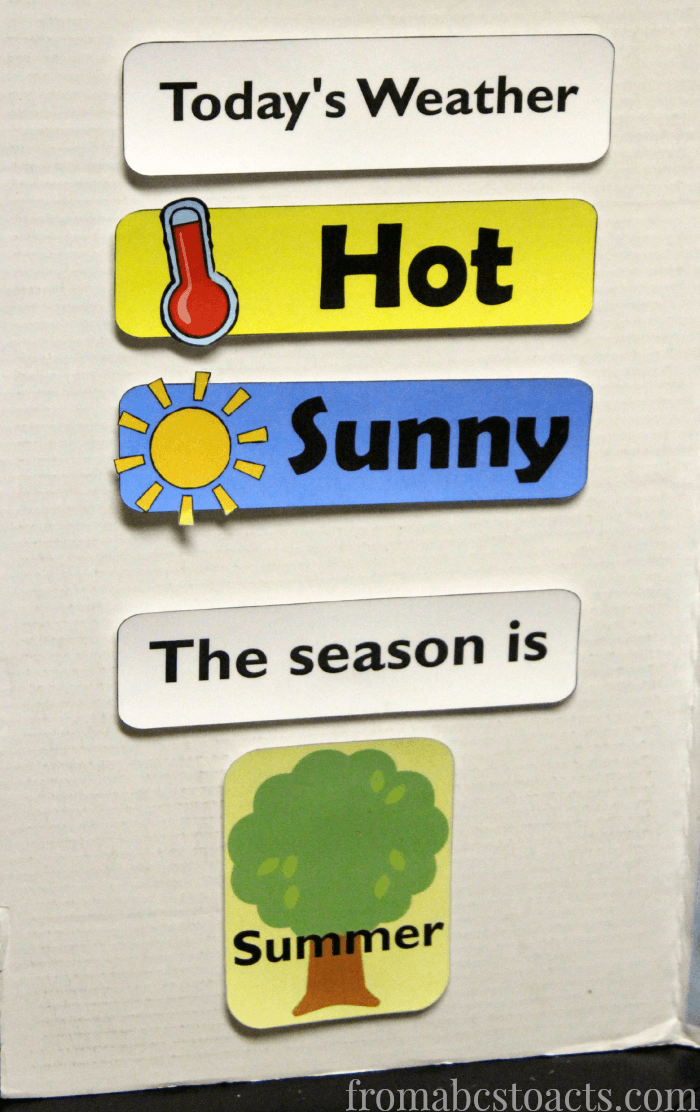
Finally, underneath our days of the week, we have our weather and season sections. These two are actually my favorite part of the whole board :)
Again, we used Velcro to attach the pieces and each day we change out the cards to match the day’s weather and it gives us an opportunity to talk about seasons and when they change.
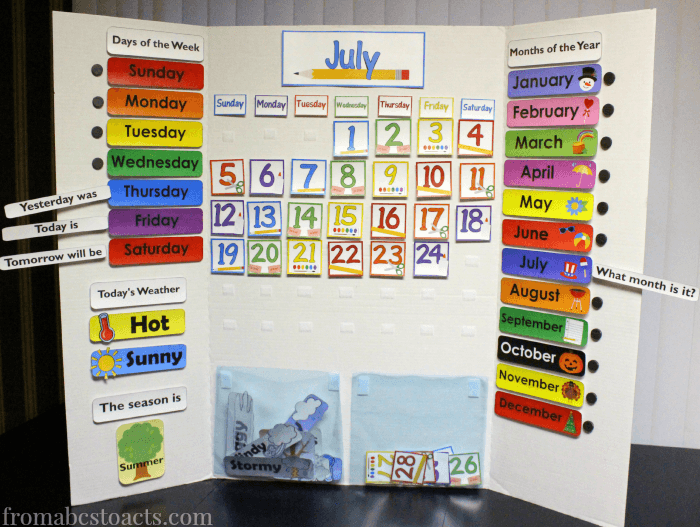
From start to finish, the entire thing took about 2 hours to put together and the majority of that time was just attaching Velcro and it has already seen plenty of use. Fortunately, it looks like the Velcro is holding up to a very eager preschooler and his helpful little sister and having the magnets has already saved us from overusing and ripping off Velcro from the days of the week section.
If you’d like to try making a calendar board of your own, go ahead and grab the school supply calendar set and the months of the year printable set below. I’ll be sharing the rest of the printables that we used to make ours over the next week or two so hopefully, you’ll be all set for the new school year!
